• About

CurlPlease

~ Just a girl living in a curly world

CurlPlease

Tag Archives: Curls

Using a Curl Wand on Natural Hair

11 Monday Mar 2013

Posted by curlplease in Hair Routine, Hair Stuff, Natural Hair, Style

≈ 6 Comments

Tags

Curl Wand, CurlPlease, Curls, easy, Hair, How To, Jilbere, Love, Natural Hair, Products, Style, Tips

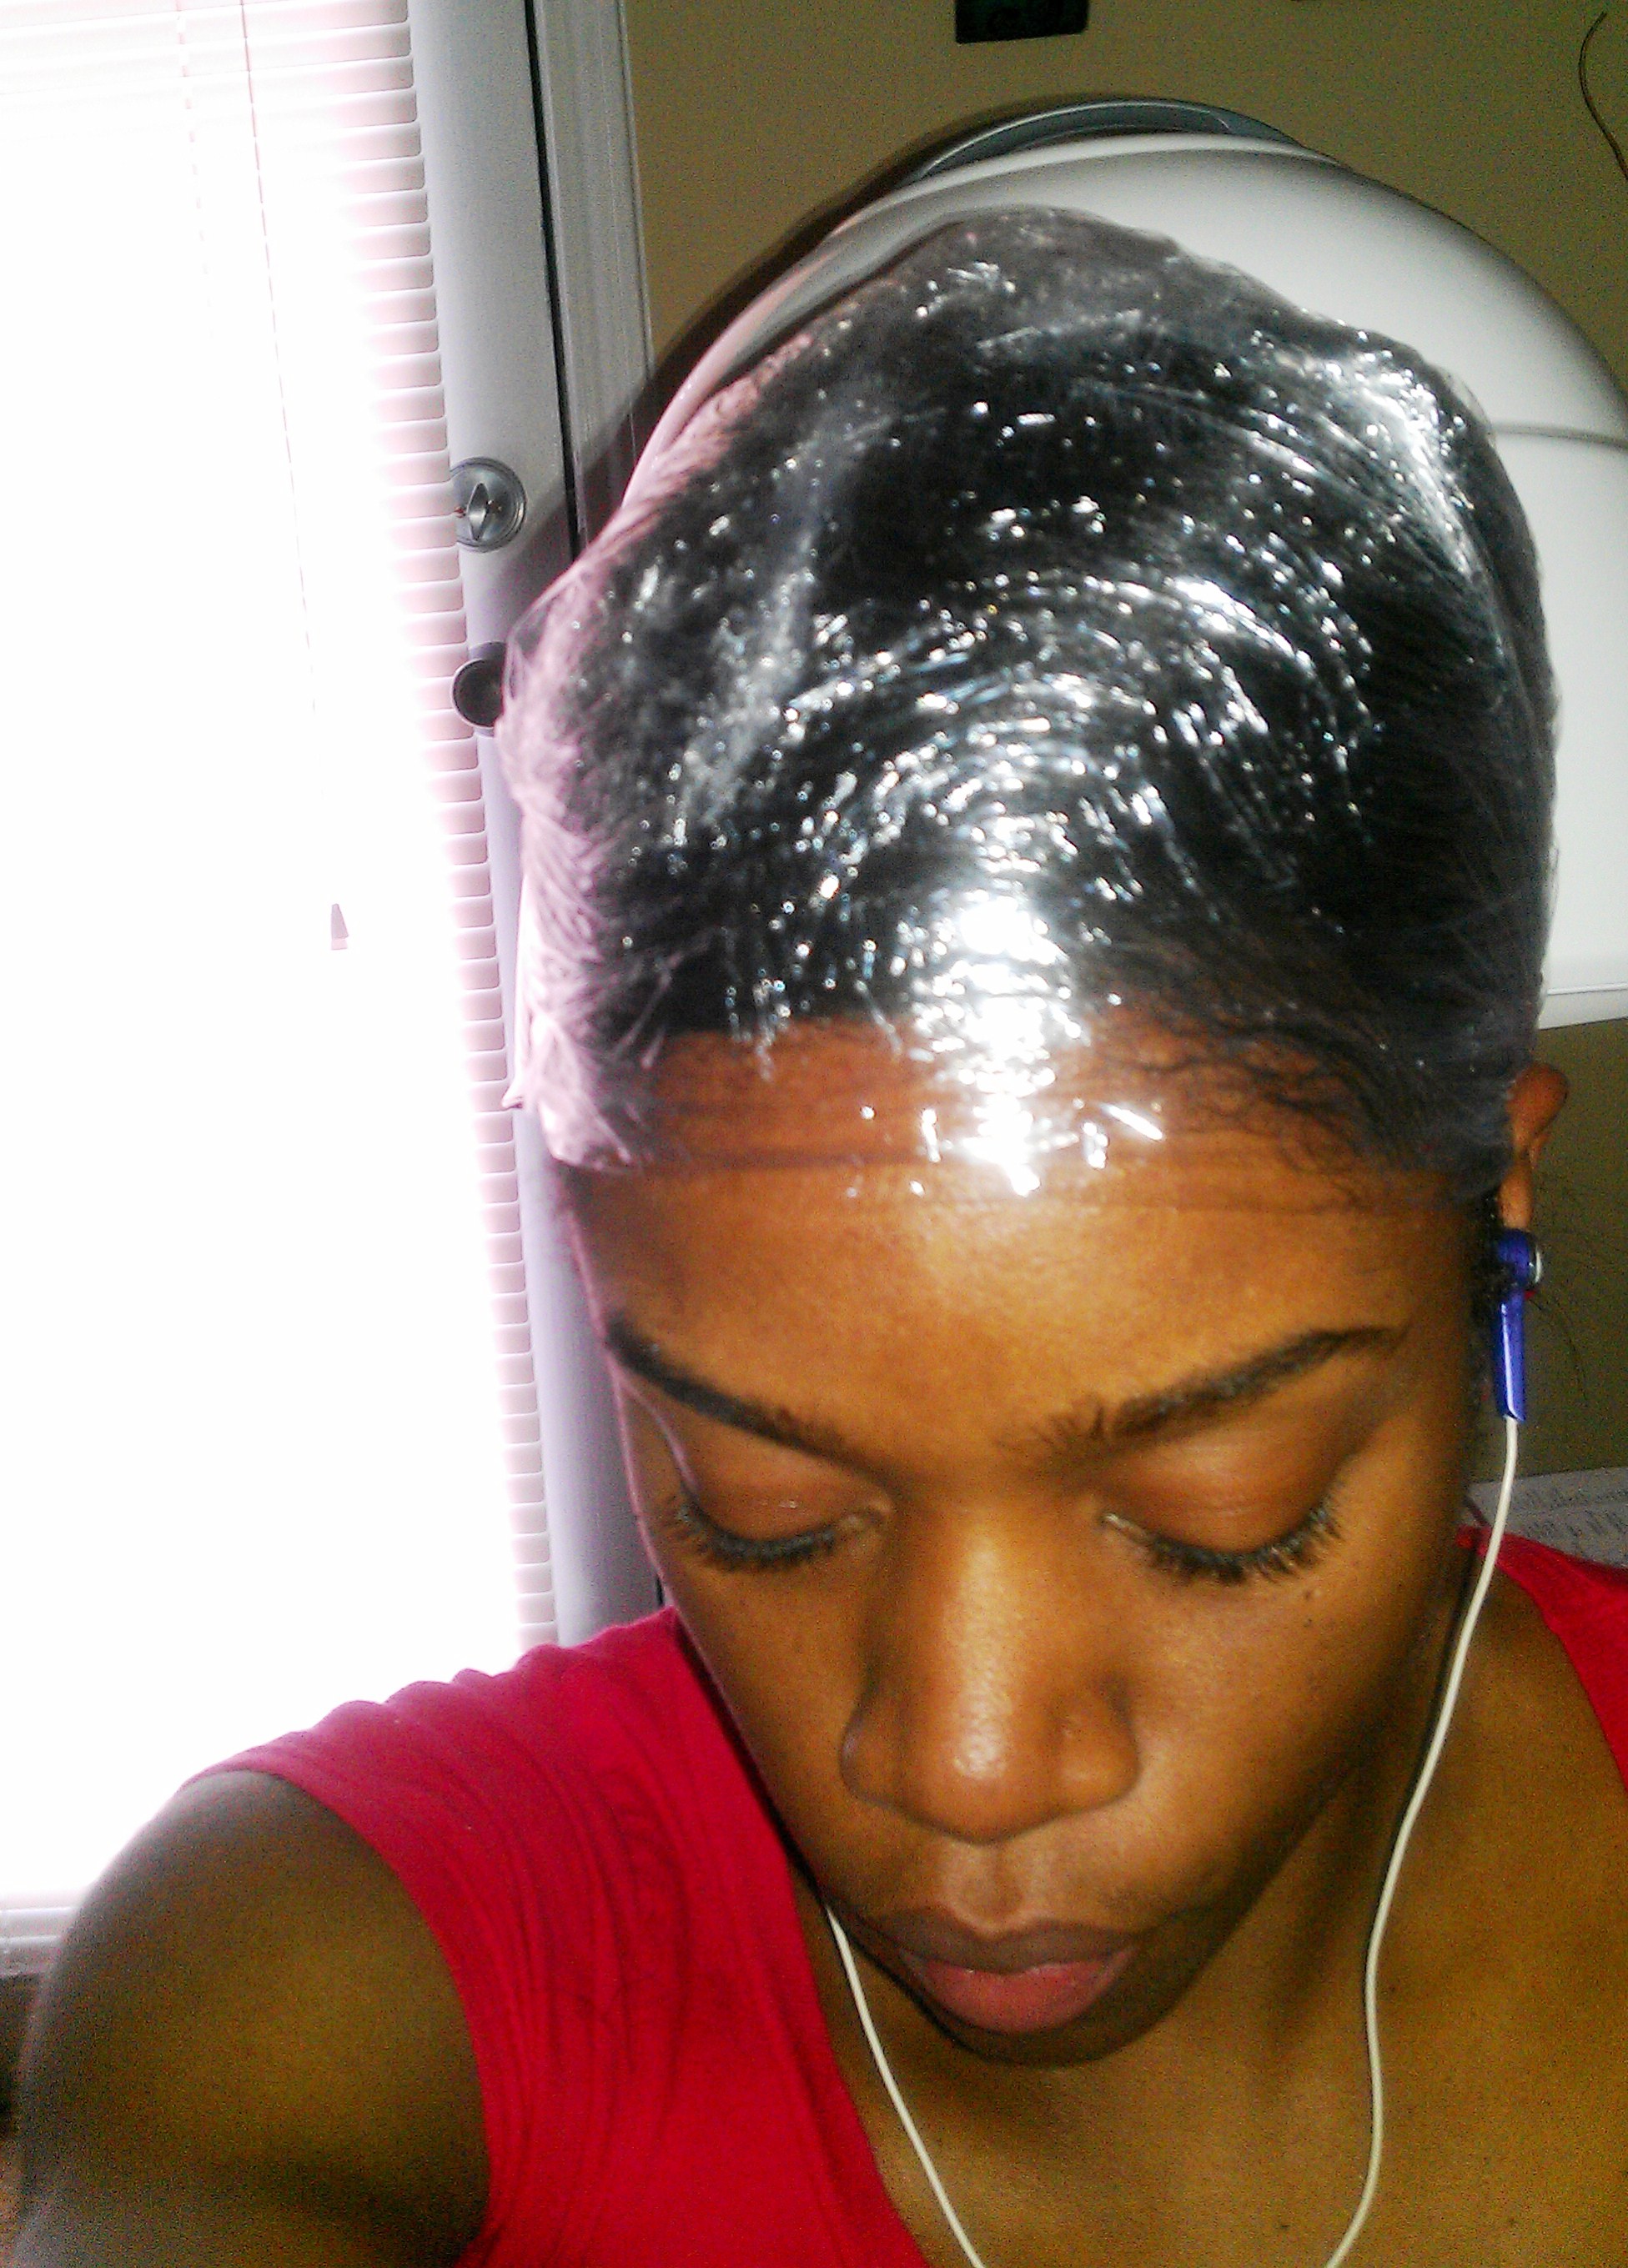
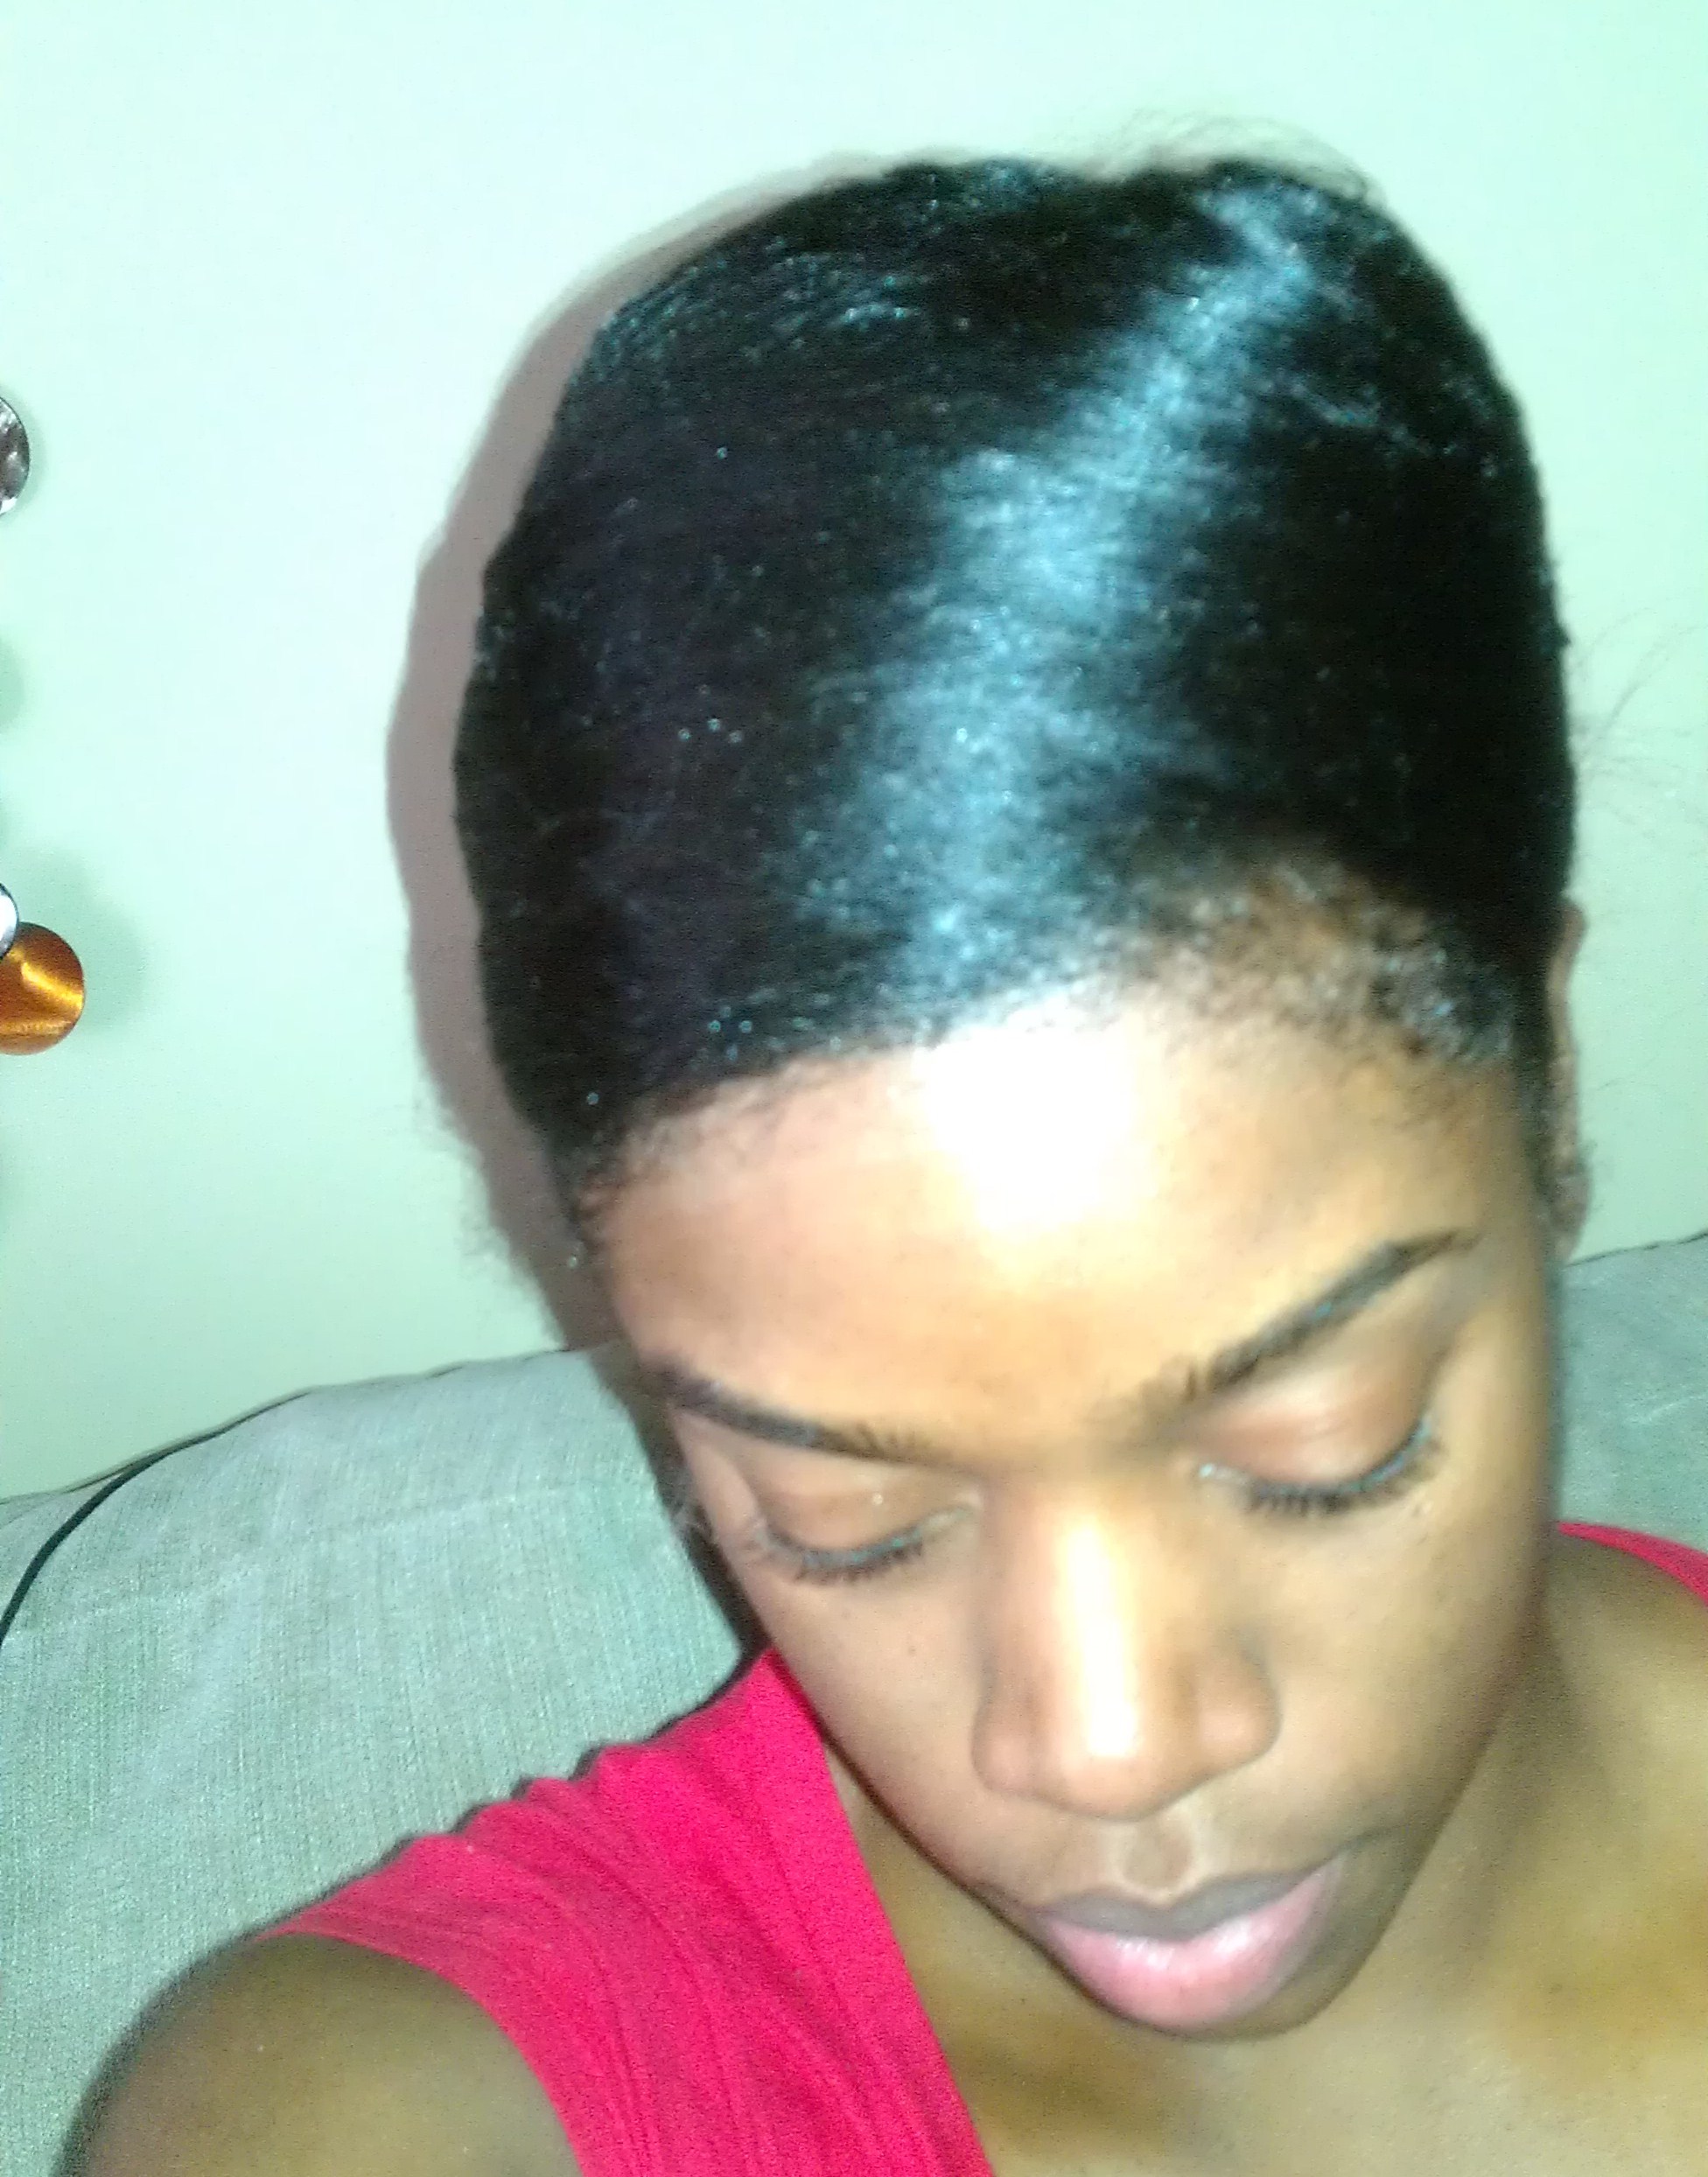
I recently purchased a Jilbere Curl Wand from Sally’s Beauty Supply. I picked it up for about $55. I chose Jilbere over any other brand because of the good results I’ve had using my 1″ and 1/2″ wide flat irons that I own by Jilbere. It was kind of awkward finding the best position for my hands to hold the wand, but around the 3rd or 4th curl, I had a nice routine going. I started by washing and conditioning my hair. Then I let it dry about 85% using a cotton T-Shirt wrapped around my hair like a turban. I took the turban off, sectioned my hair into 4 quadrants, sprayed each section generously with Aveda Brilliant Damage Control Spray and clamped them into place. Curl Wand 001

Before blow drying each section, I applied a quarter sized amount of grapeseed oil from root to end. Grapeseed oil is a natural heat protectant with a high smoke point of around 400 degrees. I made sure to be thorough with my blow drying so that the curls would be as smooth as possible and would require less direct heat contact with the wand.

Curl Wand 005

The Curl Wand also came with this really neat glove to protect your fingers from the hot curling wand. I opted to go with out the glove because it hindered my grip on the hair and I didn’t like it.

Curl Wand 006

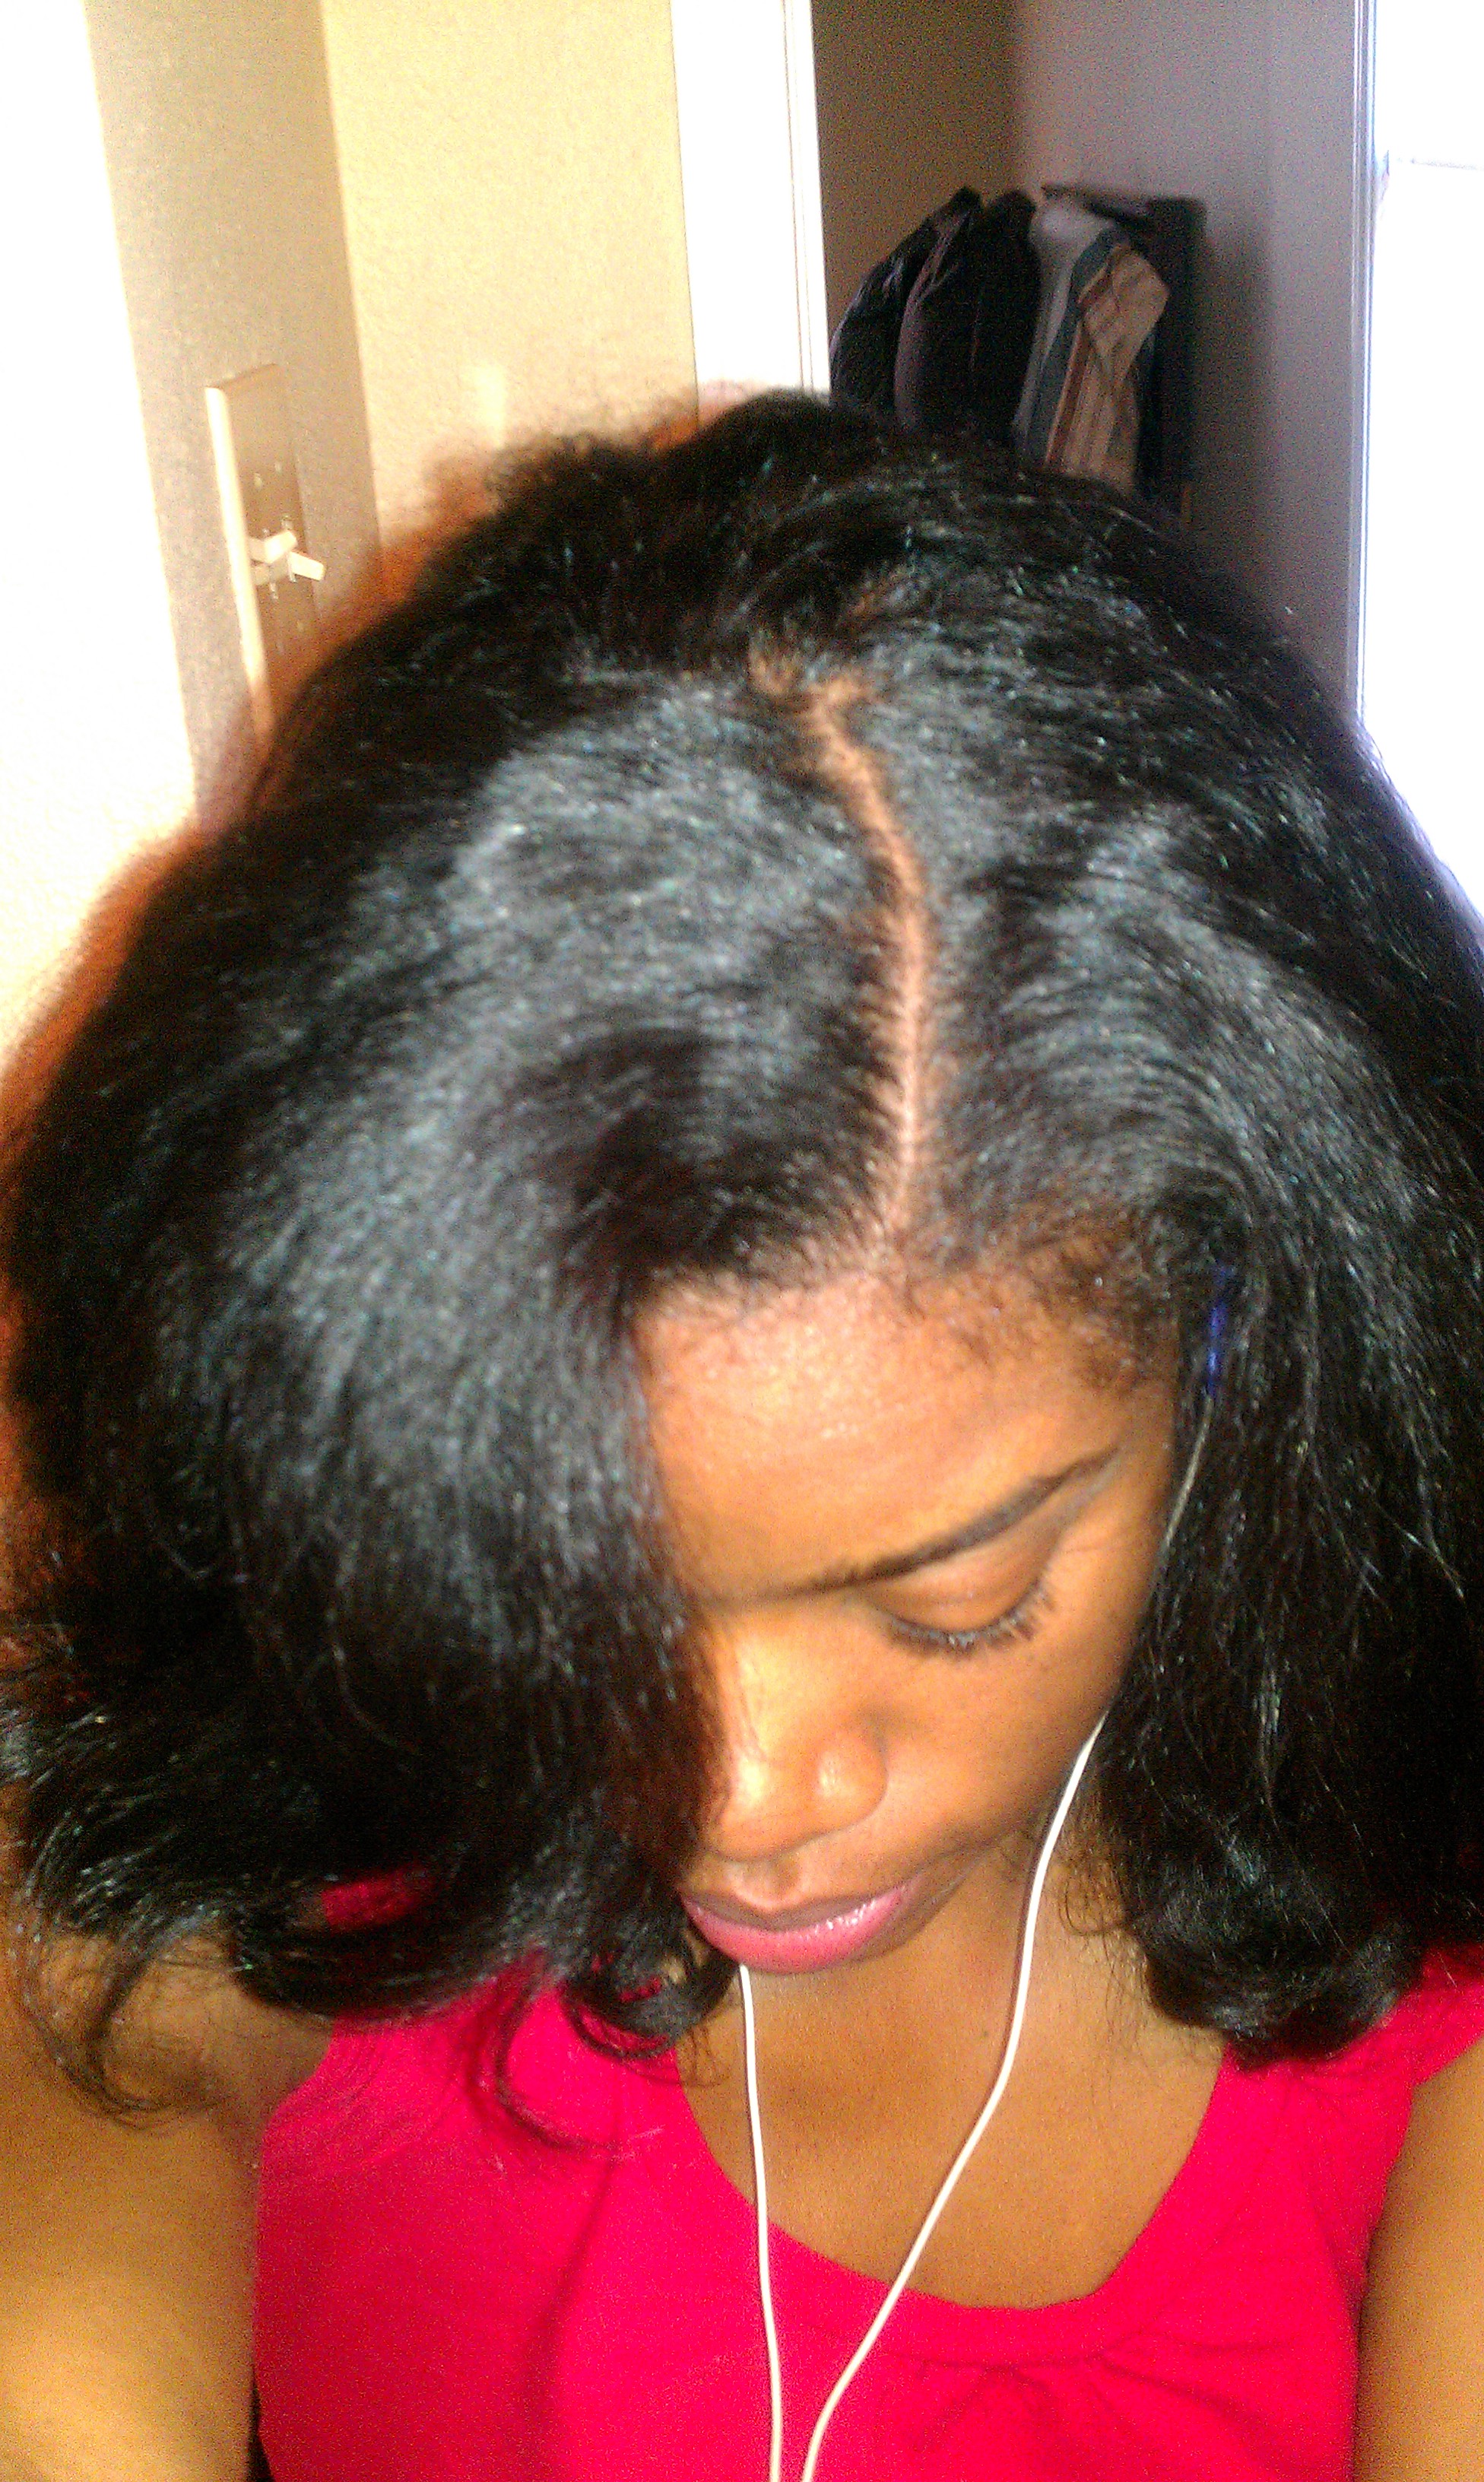
First, I took 1″ sections of hair and sprayed the 1″ section generously with medium hold hair spray.

Curl Wand 007

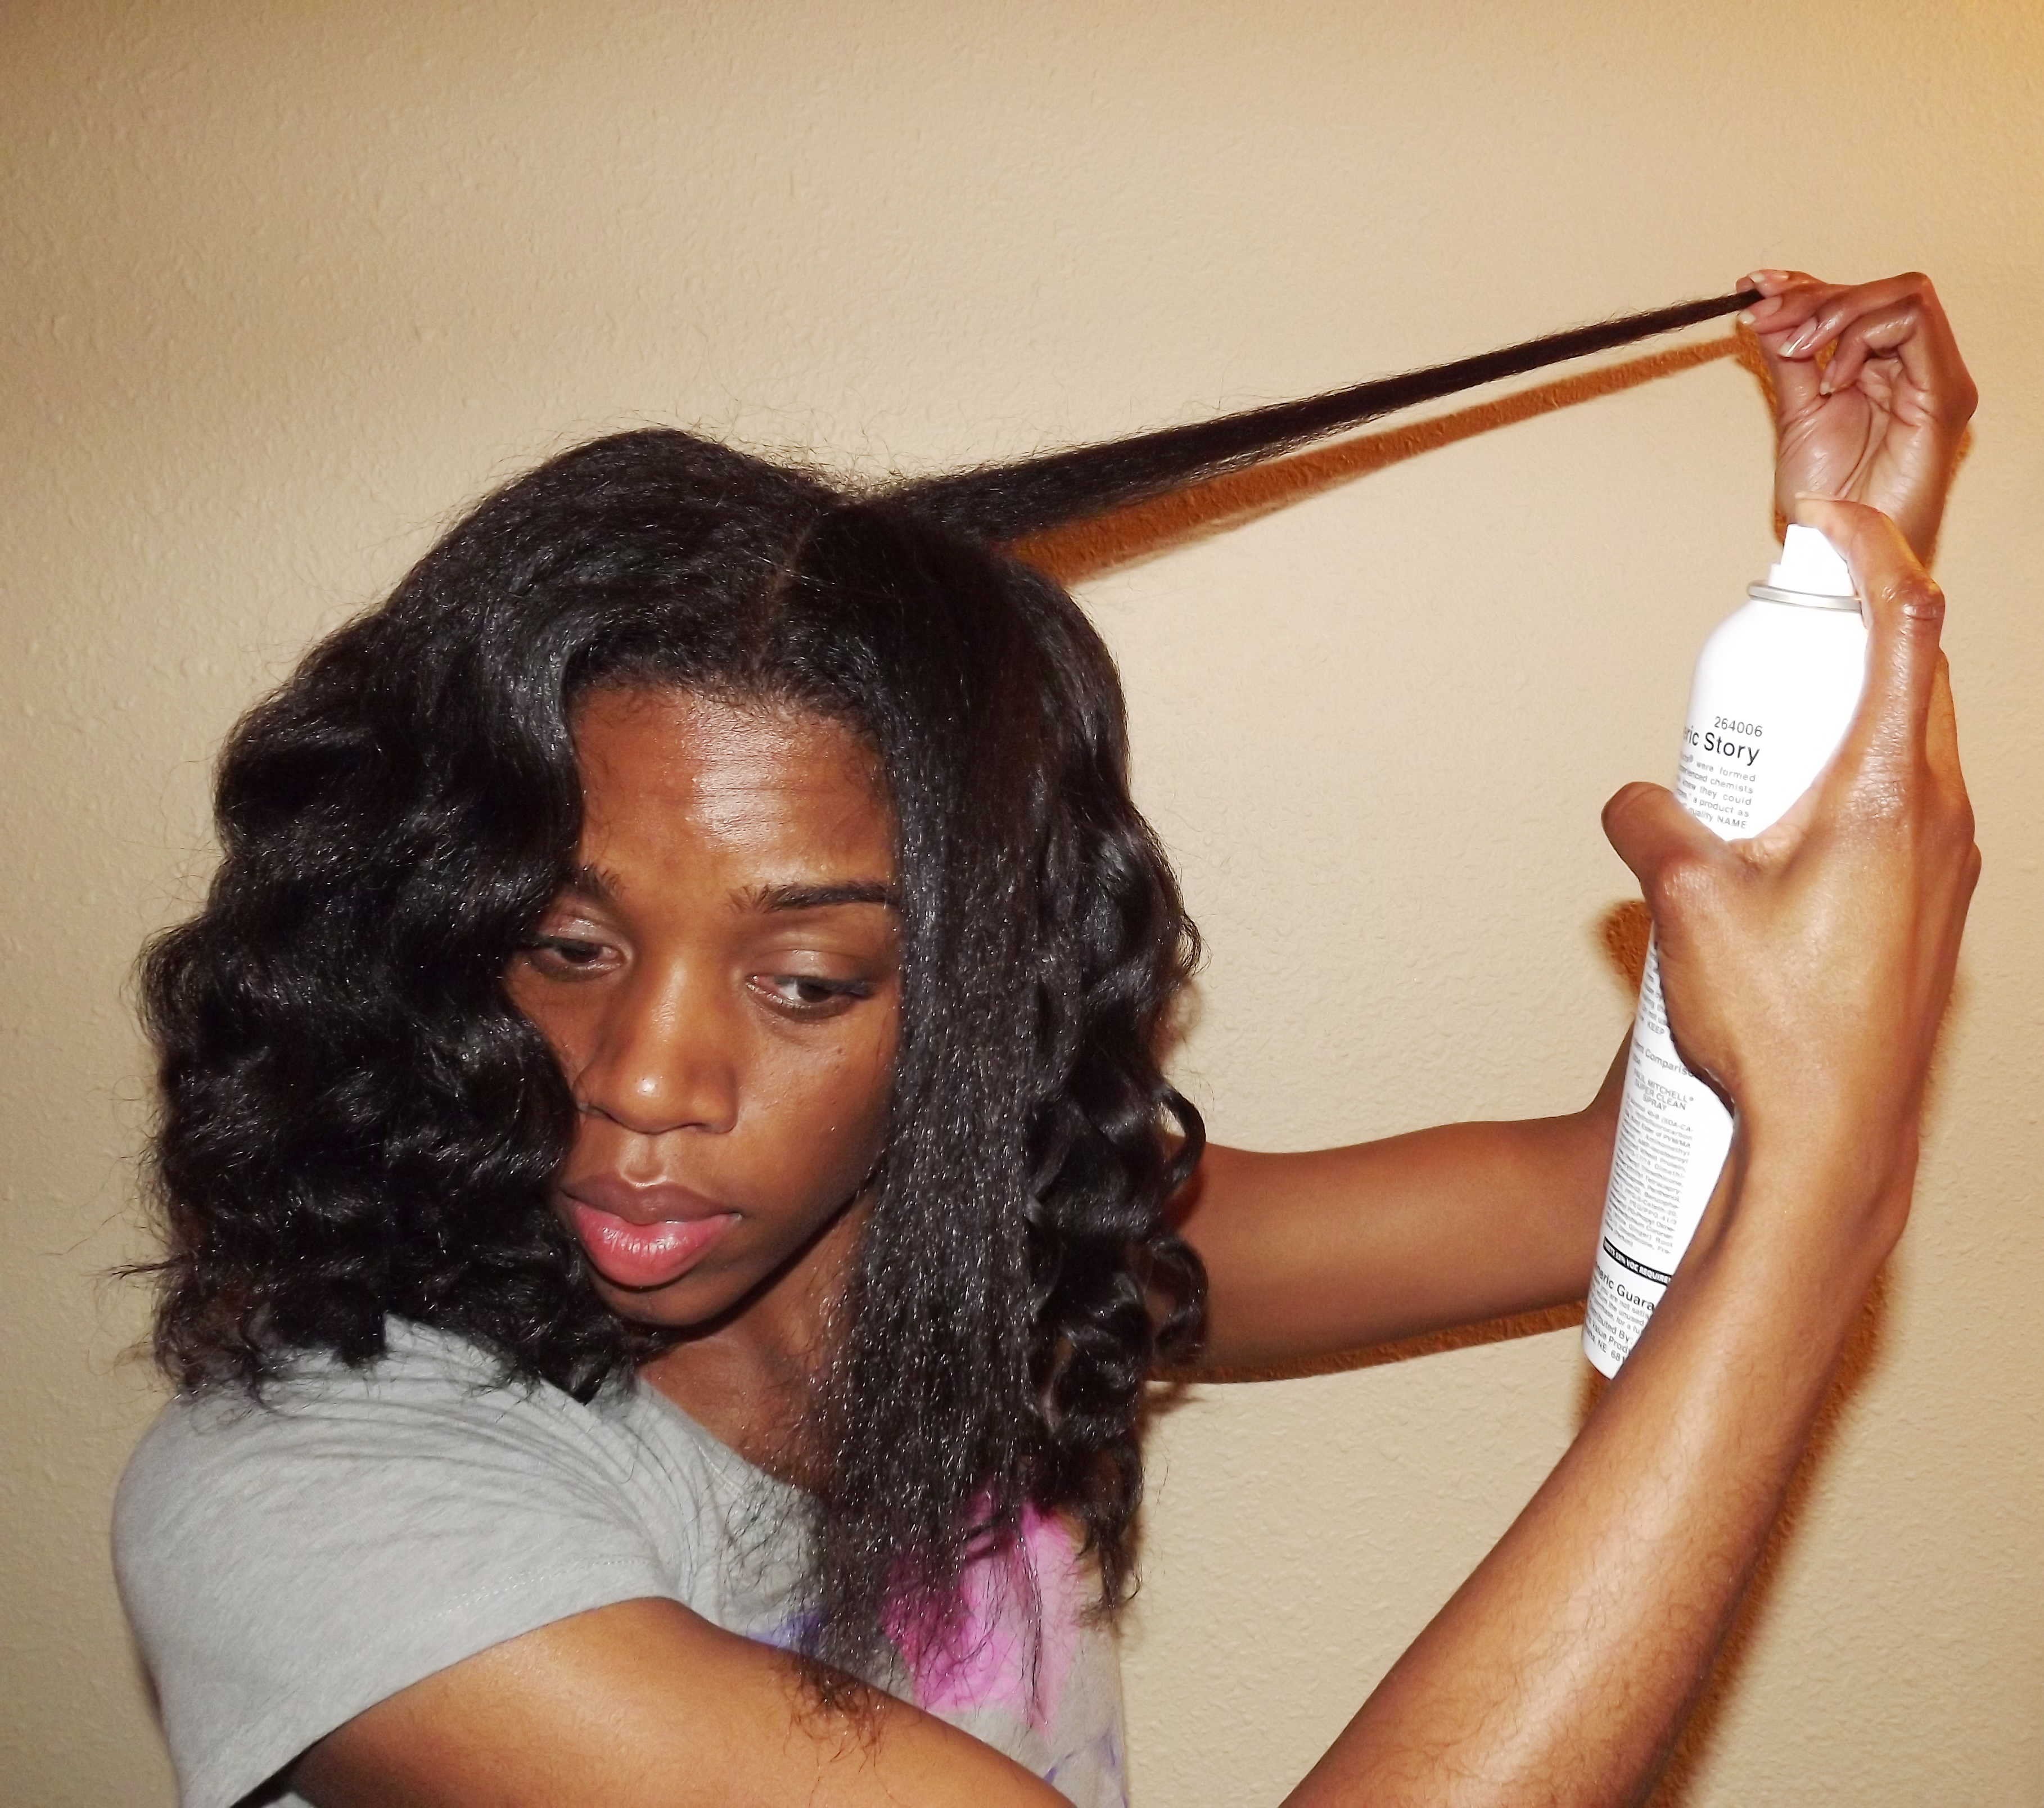
To curl the section, grab the center of the length of the hair firmly, position the curling wand base (the wide end) at the base in front of the section of hair and wrap your hair forward and under around the wand until you reach the end of your hair. Then, hold the end of your hair tought around the end of the wand and count to ten.

Curl Wand 009

Curl Wand 008 
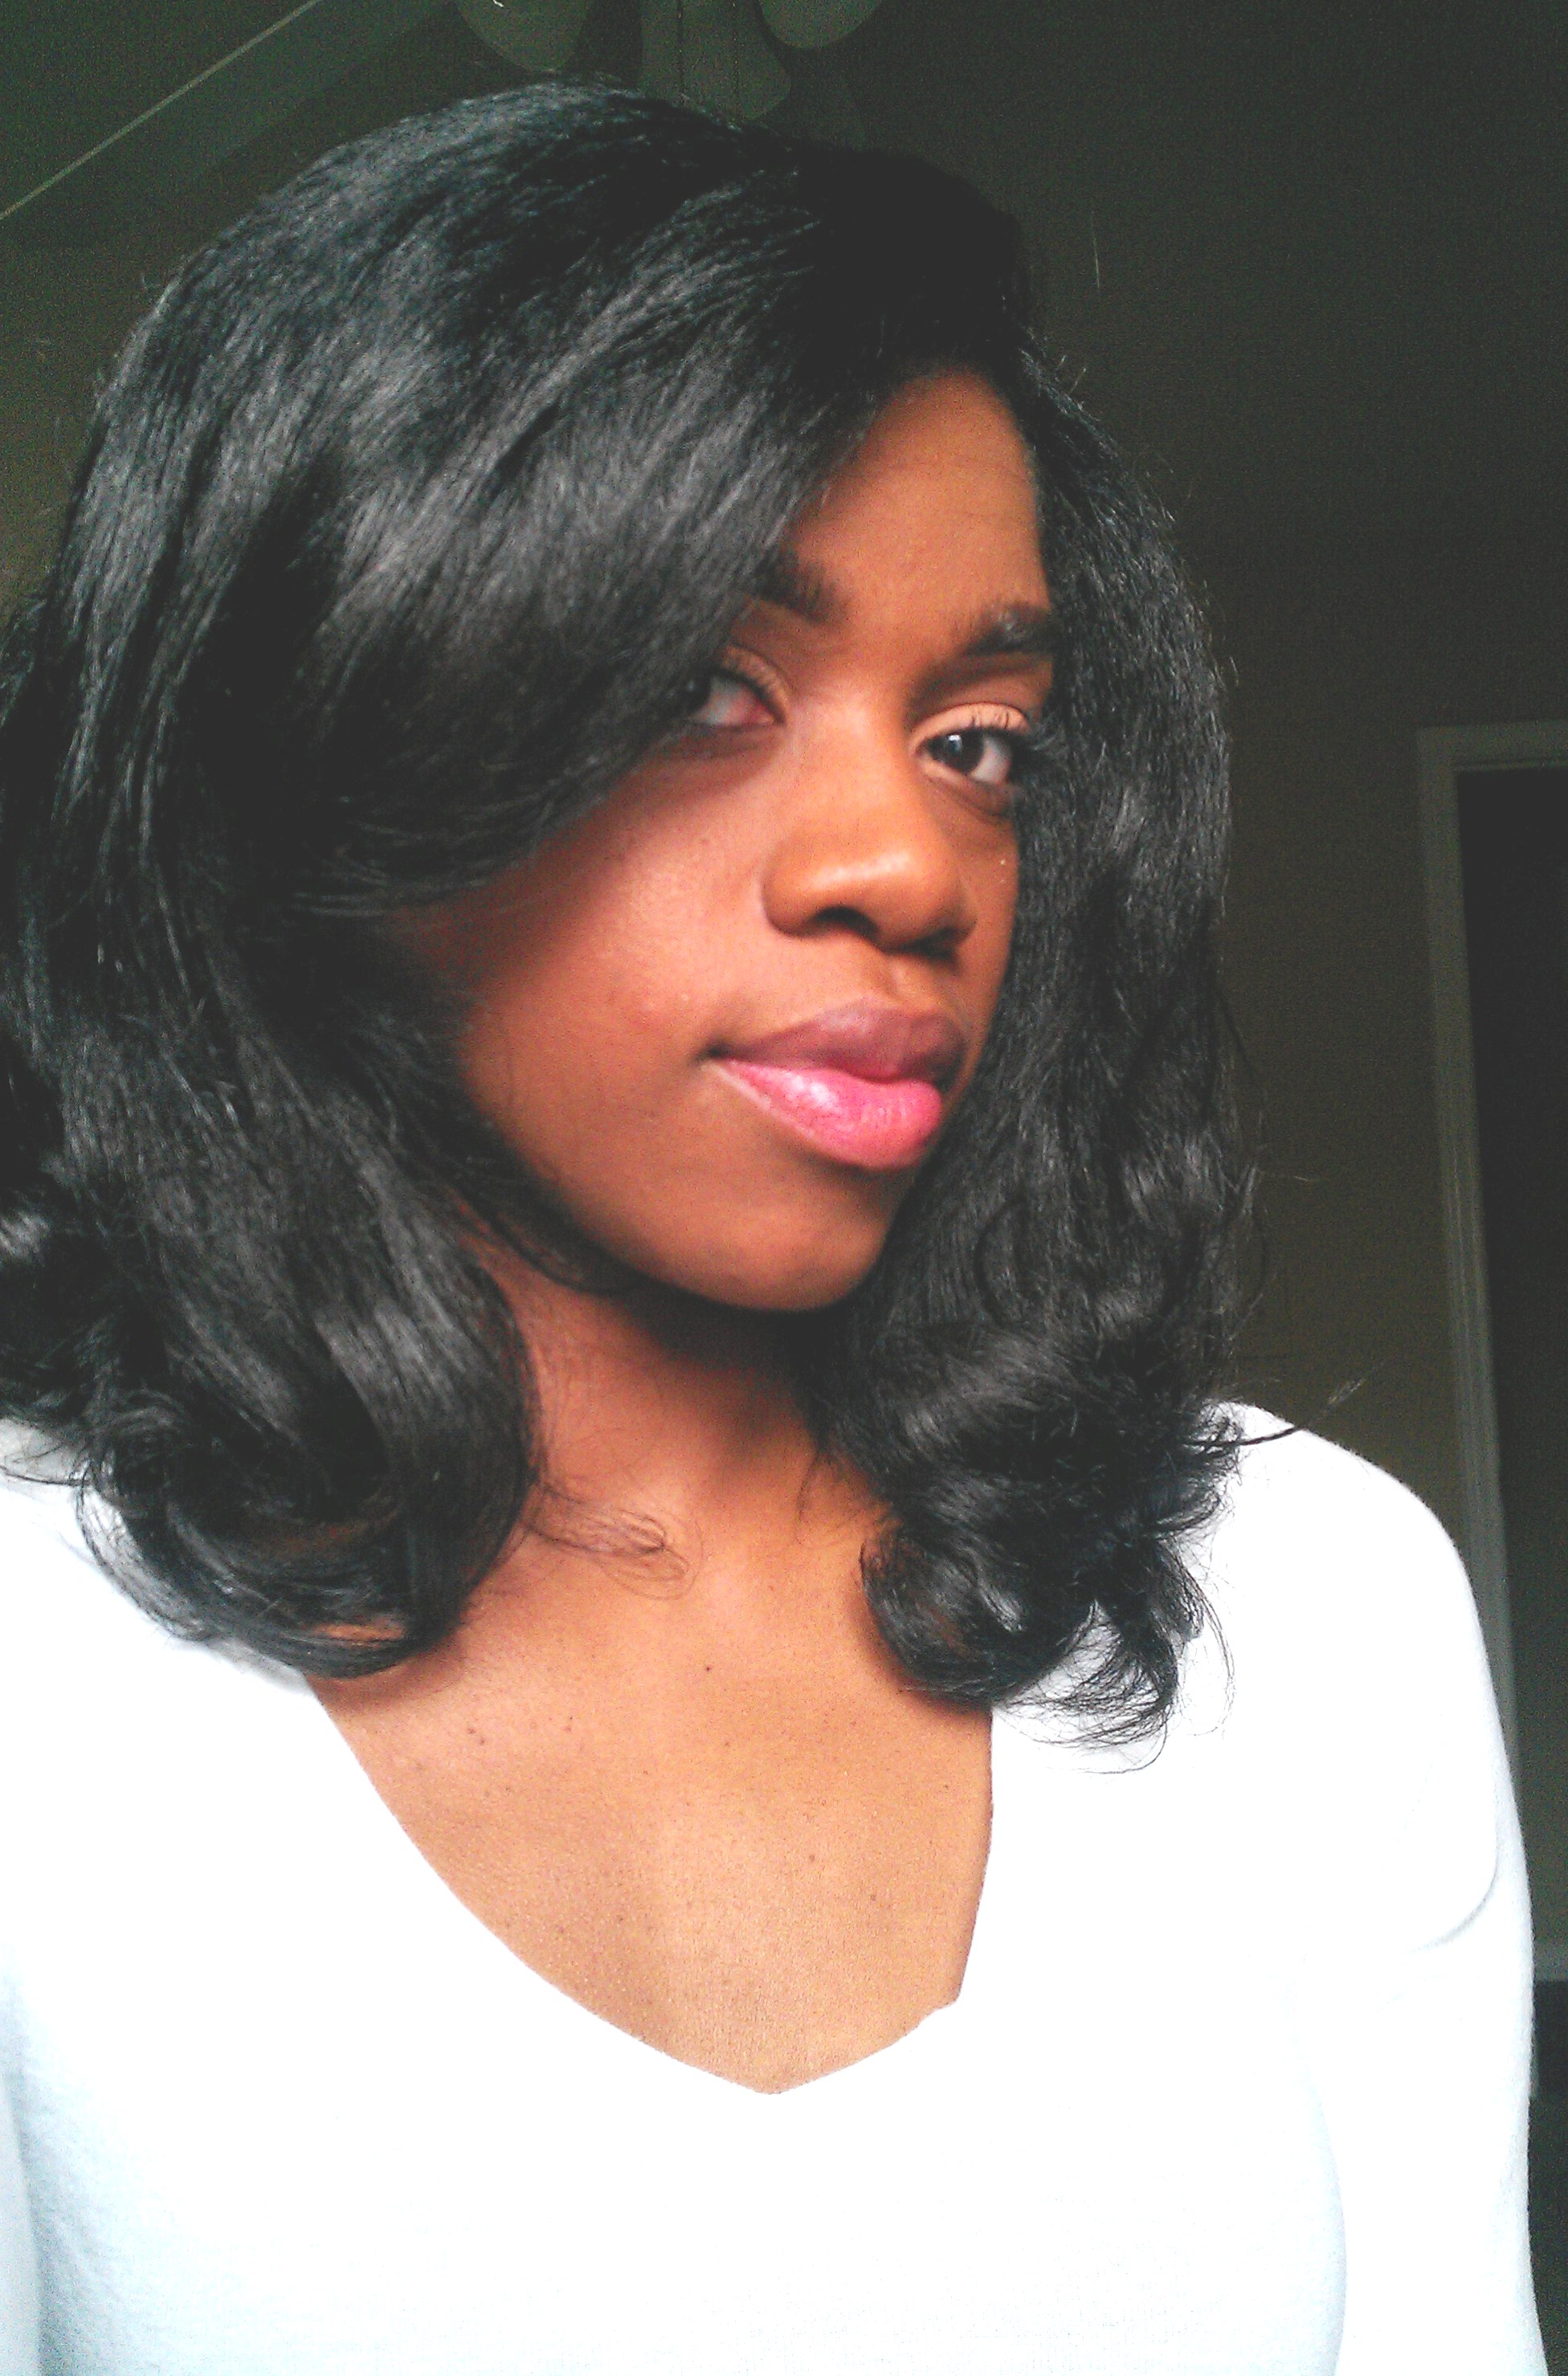
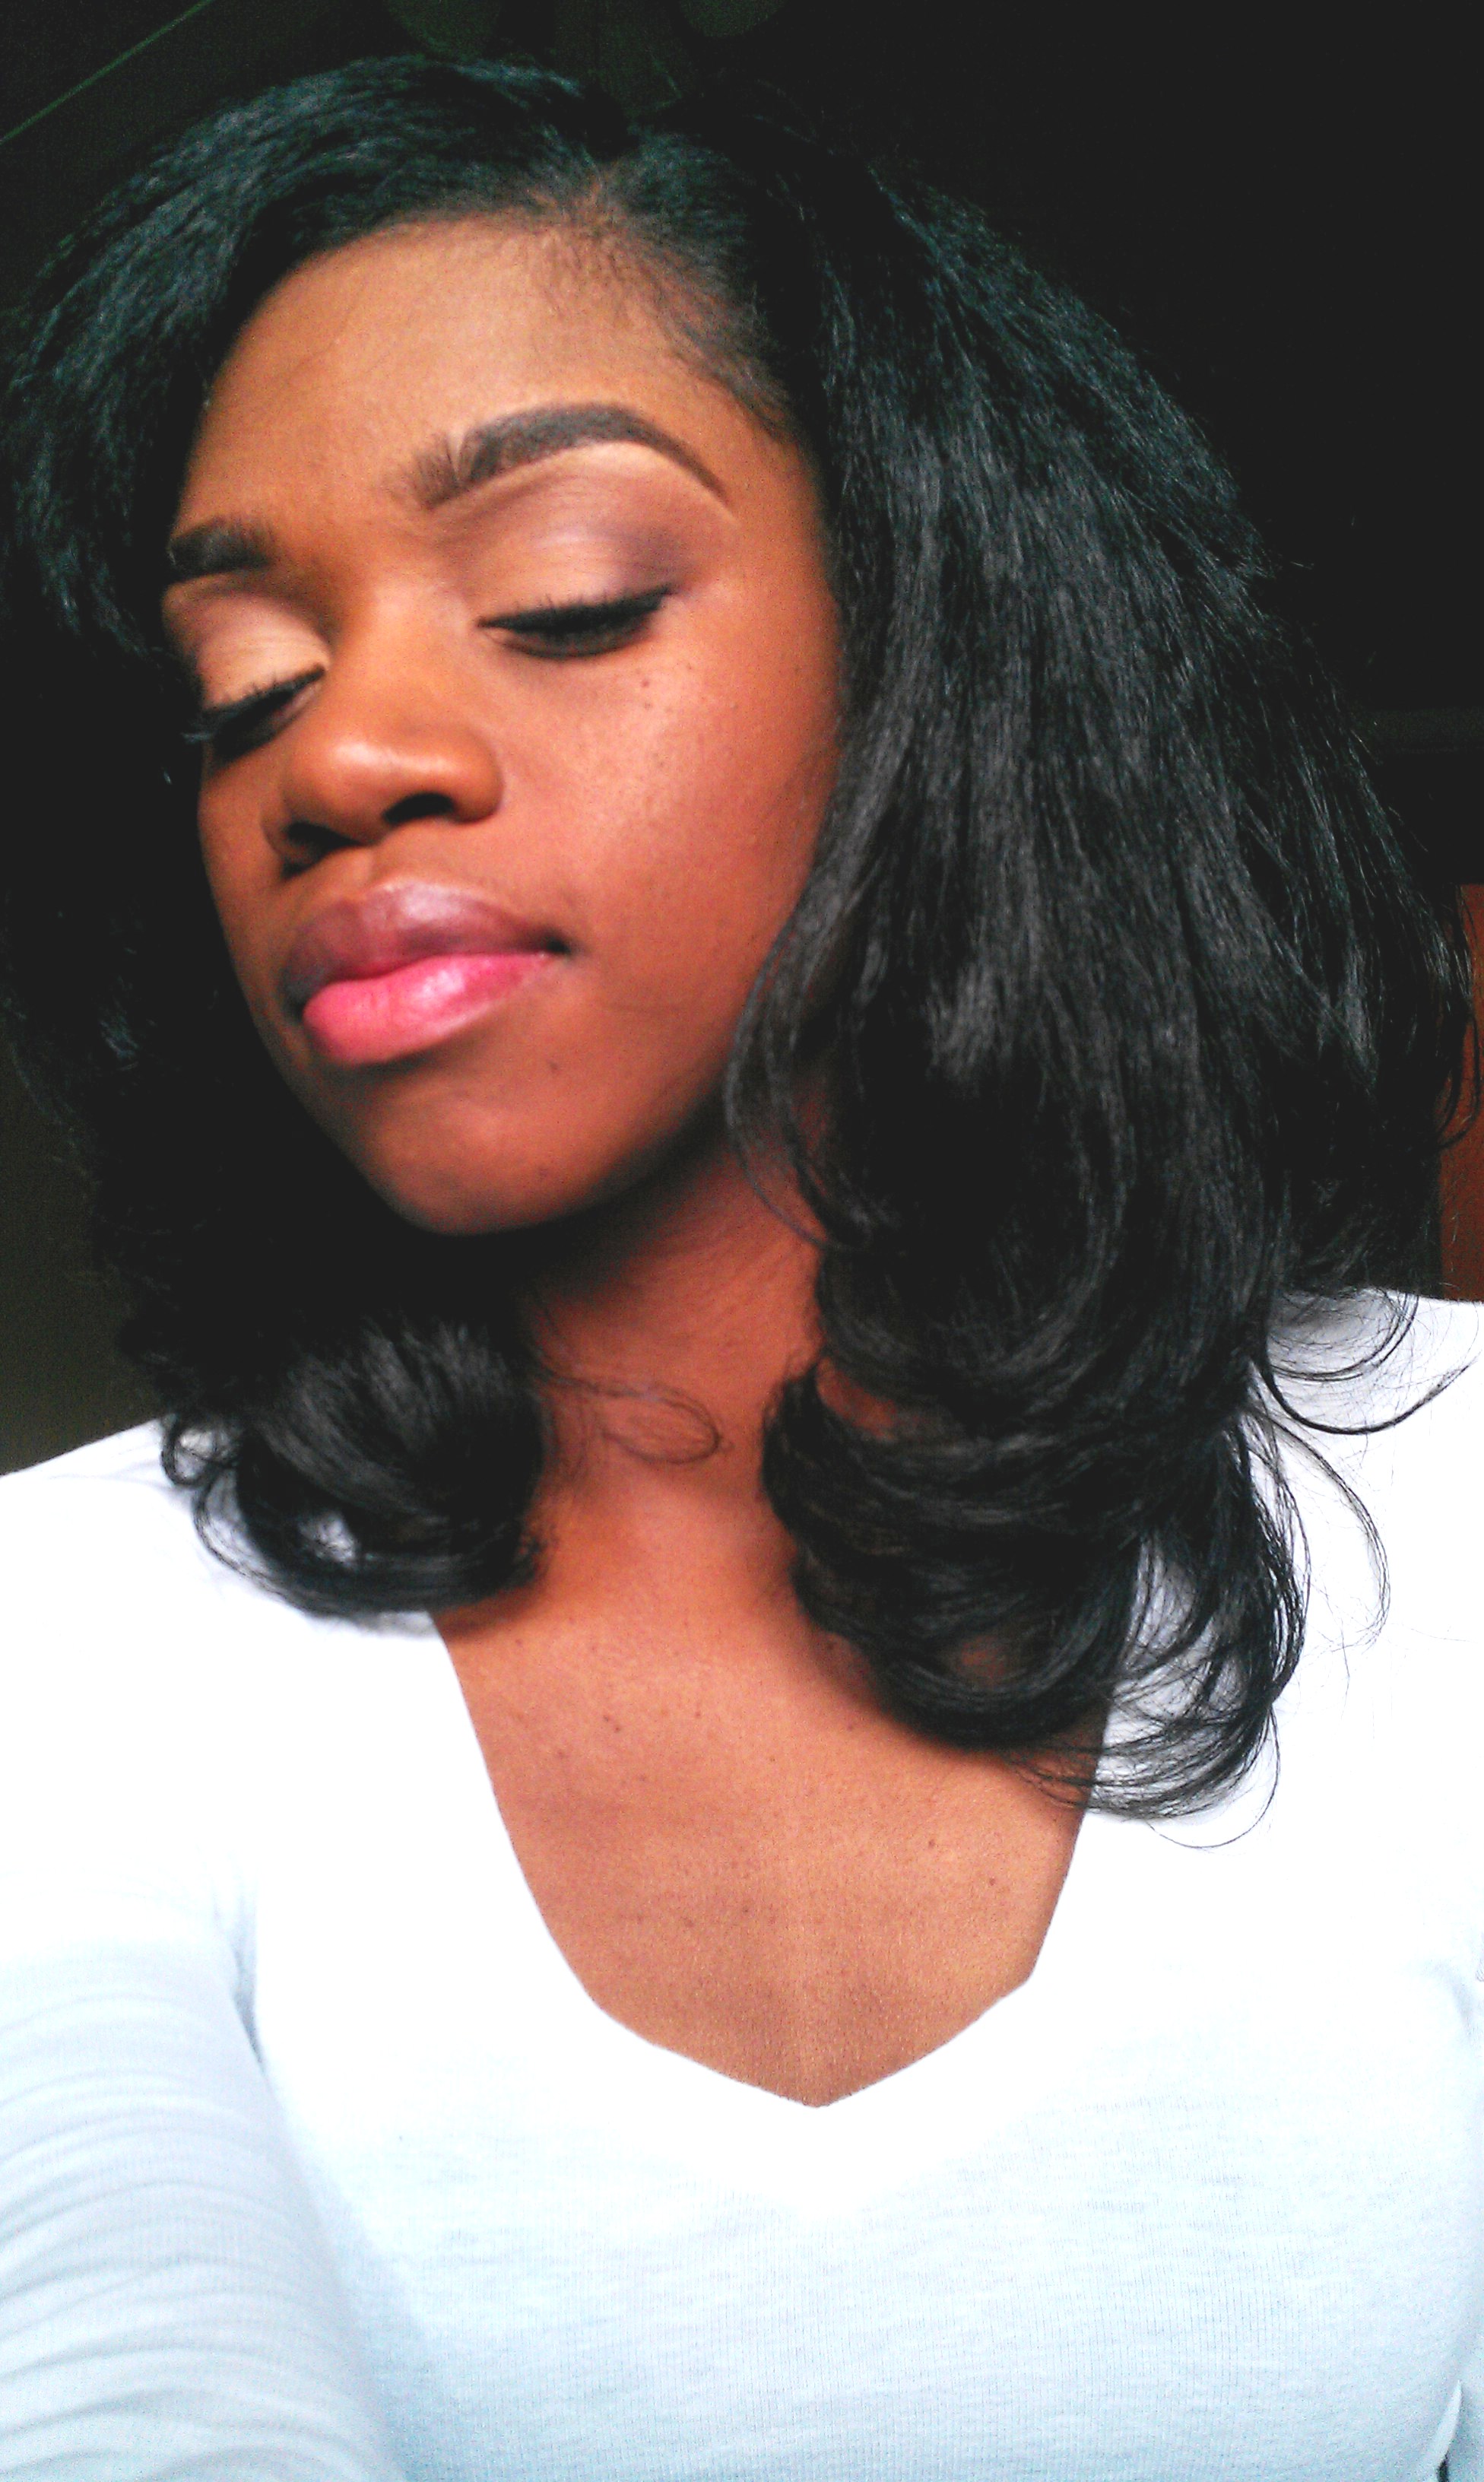
Release the hair from the wand and Voila!! Gorgeous curls abound!

Curl Wand 011

Curl Wand 012

Curl Wand 013

Curl Wand 010

I’m soooooo happy I purchased this wand!!! It did a great job! This style is perfect for special occasions and doesn’t take long to do at all. It’s also an easy style to touch up. The only con is that, if you don’t flat-iron your hair before using the wand, the style won’t last long. However, flat ironing before “curl wanding” takes away the body and volume. Either way, I love this style! This is great date, wedding, and any occasion hair! Two thumbs up!

 TIPS!

  • Don’t grab big sections of hair
  • Be generously with the MEDIUM HOLD hair spray BEFORE curling
  • Spraying Holding spray after you’ve curled the hair will cause frizz because of the moisture of the spray
  • Used a humectant/anti-frizz serum on top of the grapeseed oil if you have some available

Enjoy!

Lina

Share this:

  • Facebook
  • Twitter
  • Email
  • Pinterest

Like this:

Like Loading...

The Life and Death of a Twist-Out

04 Monday Mar 2013

Posted by curlplease in Hair Routine, Hair Stuff, Natural Hair

≈ 3 Comments

Tags

CurlPlease, Curls, Ecostyler olive oil gel, Hair, Natural Hair, Twists

I wrote this post to remember all of the fallen twist-outs of the world. Their beauty gives us so much fierceness and bring so many compliments to the lives of Naturalistas all over the world. The world needs more fabulous twist-outs that bring sunshine to our lives. I’m going to take this opportunity to share the life and death of my dear friend Twist-out number 157.

She was born late one Friday night to freshly washed hair and Ecostyler gel…Saturday she gleamed with grape seed oil and shine bright like a diamond. 🙂IMAG2295

She was well taken care of and was lovingly pineappled on Monday night to preserve her good looks. She always tried to keep herself up, She was in her prime…

IMAG2314

Although the storms of life came and sprayed her a bit, she was still in high spirits and pulled herself up by the boot straps into a high pony tail and pretty head band on Wednesday…

IMAG2332

Although she was highly optimistic, when the rain came, she was never the same. So she had to do what she had to do. She tucked and rolled on Thursday…

IMAG2335

Saturday she visited her dear friends Ecostyler Gel and Banana Clip for a pick me up.  Banana clip was always there for her in her time of need to lift her up and Ecostyler gel to smooth things out when things got too frizzy…

IMAG2346

She took her last breath on a groggy sad Monday morning. She leaves behind her only child, High Bun. She will always be remembered through her loving descendant Bun…

IMAG2360

And there you have it. It’s so hard, to say good-bye, to yesterday… :-)…Hope this is as funny to you as it is to me! LOL

Have a good one!

Lina

Share this:

  • Facebook
  • Twitter
  • Email
  • Pinterest

Like this:

Like Loading...

Happy 1 Year Blogaversary to CurlPlease!!! It’s Giveaway Time!!!

23 Saturday Feb 2013

Posted by curlplease in Blogging, Make Up

≈ 17 Comments

Tags

1, Blog, Blogaversary, CurlPlease, Curls, Happy Anniversary, Love, Make up, Products

I can’t believe it’s been a year already! I’m so happy to have shared my musings about natural hair with all of you and I hope that I’ve helped and inspired someone on their natural hair journey. I am so thankful for my readers, subscribers and everyone who reblogs my posts and spread the word. I will continue to blog and post about all things girlie, fierce and natural! Happy Blogaversary!

To commemorate this lovely occasion, I’ll be giving away some beauty products that I love over the next couple of weeks! Starting with My favorite lip pencil by Nars called Dragon Girl! To enter the giveaway, comment on this post and a winner will be selected randomly after the cut off date. Each commenter will be entered into the drawing once. The contest will close on 12 am Saturday, March 2nd, 2013.

My lipstick is a Dragon Girl by NARS and my liner is a cheapie Wine color from the beauty Supply store. I also have on Ambering Rose Blush by MAC

My lipstick is a Dragon Girl by NARS and my liner is a cheapie Wine color from the beauty Supply store. I also have on Ambering Rose Blush by MAC

IMAG0835 I LOVE this lip pencil and you will too! Comment below for the chance to win!!

Thanks for reading!!

Lina

Share this:

  • Facebook
  • Twitter
  • Email
  • Pinterest

Like this:

Like Loading...

Silk Wrapping Natural Hair

18 Monday Feb 2013

Posted by curlplease in Hair Routine, Hair Stuff, Natural Hair, Natural Hair Regimen

≈ 5 Comments

Tags

Curls, Hair, How To, Natural Hair, Roller Set, Tips

After doing a roller set on my hair, I try to also do a silk wrap to smooth it. After removing the rollers, I generously apply grape seed oil to the uncombed curls. If you have some available, I also recommend applying some sort of humectant, or silkening serum. Next, I use a paddle brush with wide teeth to brush all of my hair in a circular motion around my head, wrapping my hair. After “wrapping” my hair, I use a soft bristle brush to smooth the wrap. then apply good old Saran Wrap around my head covering my hair completely. IMAG2117

After the Saran Wrap is on my hair, I sit under a hooded dryer for about 15 minutes. I do not recommend sitting under the dryer for more than 15 minutes because your scalp and hair may start to sweat causing reversion. After 15 minutes is up, I come from under the dryer and let the Saran Wrap stay on my head until it is completely cooled allowing the cuticles of my hair to close.

After the Saran Wrap has cooled, I remove it and use a wide tooth comb to gently comb the wrap down, being sure not to comb the hair too much.

IMAG2120

IMAG2123

IMAG2133

IMAG2135

IMAG2127

IMAG2138

I love the sheen, and smoothness that silk wrapping gives my hair. I recommend silk wrapping to anyone looking to relax tight curls from a roller set.

Happy Wrapping!

Lina

Share this:

  • Facebook
  • Twitter
  • Email
  • Pinterest

Like this:

Like Loading...

Quick & Easy Roller Set Using the Ponytail Method

21 Monday Jan 2013

Posted by curlplease in Effortless Style, Hair Routine, Hair Stuff, Natural Hair

≈ 8 Comments

Tags

CurlPlease, Curls, easy, Hair, Natural Hair, Roller Set, Shampoo, Style, Tips

One Friday as I sat on my couch lurking on Youtube, I came across a tutorial on a rollerset using the ponytail method. After watching a few more, I decided to give it a try. I was truly surprised at the results. Because of the ponytails, I was able to install my rollers in half the time that it takes me to do a traditional roller set. The set looked so smooth and dried fast (Hooray!) and I loved it. This is a good method to have in your arsenal.

Here’s what you’ll need:

24-30 Bouffant rollers (I used the snap on type), Foam wrap, a wide tooth rat-tail comb, narrow tooth rat-tail comb, a spray bottle filled with water (to re-wet hair if needed), scissors, Rubber bands, Two hair roller hair nets, and an electric hot comb.

I started with washed and deep conditioned hair. Then I sectioned my wet (but not dripping) hair into three sections ear to ear front, crown and back. I each section make 2 inch by 2 inch pony tails such small rubber bands. I used rubber bands because the small cotton scrunchies would 1. cover up too much of my hair at the base and it wouldn’t get dry and 2. You would have to slide them down your hair to get them off and I don’t like the thought of possibly ruining my curl.

Note: In order for this method to work and your roots to be smooth, the pony tails must me pulled firmly, not painfully tight, but snug so that the rubber bands don’t slide and so the roots will be straight.

For Each sectioned ponytail, apply foam wrapping lotion to the entire ponytail, split the hair in two, detangle with a wide tooth rat-tail comb, and smooth the ends with a narrow tooth rat-tail comb and install a roller.

Note: Each sectioned and split ponytail should have 2 rollers.

IMAG2070

IMAG2075

Continue rolling until your ponytails are all rolled…

IMAG2076

IMAG2079

IMAG2084

Put a hair net over your rollers to hold them firmly into place and keep them from hanging and sliding. I needed two, because my rollers were kind of big.

IMAG2088

IMAG2089

I sat under a hooded dryer for 2 hours, and then kept the rollers in for a while as I watched TV (and because I fell asleep :-)). You can also let them air dry if you prefer no heat.

After checking a few for complete dryness in each section, I removed all of the rollers.

IMAG2091

IMAG2093

Starting with the back sections, I used pair hair scissors and cut the rubber bands from each ponytail, being carefull not to cut my hair. After removing the rubber band from a section, I touched up the area (the roots) where the rubber bands had made a crease with an electric hot comb to smooth it out.

IMAG2098

IMAG2103

IMAG2105

IMAG2108

IMAG2110

IMAG2111

Setting the hair with the roots pulled taut really helps achieve the coveted smoothness that makes roller sets look so wonderful. I really like this method, and it really stands a chance to replace the traditional mohawk rollerset.

Try it! Enjoy!

Lina

Share this:

  • Facebook
  • Twitter
  • Email
  • Pinterest

Like this:

Like Loading...

My Wash n’ Go: The Difference a Year Can Make

14 Monday Jan 2013

Posted by curlplease in Hair Stuff, Natural Hair, Uncategorized

≈ 2 Comments

Tags

Before and After, CurlPlease, Curls, Ecostyler olive oil gel, Hair, Natural Hair, Pictures

I ran across a picture of my hair in a Wash n’ Go from January 13, 2012 and compared it to another picture I took in December 2012. What a difference a year makes!

??????????

January 2012


IMAG1779

 December 2012


Natural hair grows!!! There is not some magical product that makes it grow, its consistency…Wash, detangle, seal, protect. I trimmed my hair once in 2012.

Peace!

Lina

Share this:

  • Facebook
  • Twitter
  • Email
  • Pinterest

Like this:

Like Loading...

Winter Protective Style: Two Strand Twists Updo

20 Thursday Dec 2012

Posted by curlplease in Hair Routine, Hair Stuff, Natural Hair

≈ 6 Comments

Tags

CurlPlease, Curls, Eco Styler, Ecostyler olive oil gel, flat iron natural hair, Hair, Love, Natural Hair, Tips, Tricks, Twists

I was lurking on YouTube Friday night searching for some inspiration to do my hair and came a cross a fab naturalista’s YouTube page by the name of xgoldn. She did the simplest style with two strand twists and I had to give it a try. I usually shy away from two strand twists because… 1.) My head is HUGE and my twists don’t provide enough volume to camouflage my noggin. 2.) I feel some type of way about wearing them hanging at my workplace [sue me.] 3.) Styling twists is just something that I haven’t mastered. However, xgoldn put it so simply that I was inspired to give it a try. Check out the tutorial here!

To start, I co-washed my hair with Pantene Relaxed and Natural Conditioner and let it air dry. My twists have more volume, and don’t unravel when I let my hair sort of fro out before I twist it.

IMAG1807

I parted my hair into four quadrants and started in the back right section, two strand twisting 1/2 inch sections of hair. For each twist, I misted the section of hair lightly with water, detangled the ends with a wide tooth rodent tail comb, after that I applied about a finger tip full of Ecostyler olive oil gel to the section of hair, brushed the it with soft bristle brush paying close attention to the ends and then twisted the hair from root to end.

IMAG1812

When my entire head was completed, I did not tie the twists down. I left them loose and hanging so that they could fully air dry and slept (with no bonnet) on a satin pillow. I find that leaving my twists loose helps them stay plump and not get flattened by a scarf or bonnet. I needed them to stay full if I was going to wear them in a style.

In the morning, I liberally oiled my twists from root to end with grapeseed oil. Like xgoldn did on her YouTube video, I parted a section (from off-center of my head to ear) for my bang in the front of my head slightly bigger than hers and made a bun. Then I started to make the bang as she did but found that a few of the twists in the front of my head where too short. Instead, I opted for a loose flat twist in the front, tucked it into the bun and secured the flat twist/bang with Bobbie pins.

DSCF8223

DSCF8221

DSCF8220

DSCF8219

DSCF8217

IMAG1814

IMAG1817

To make the flat twist/bang, you just start with 2 small sections (about 2-3 twists each) of twists and twist them around each other, grabbing one twist from the loose section at each turn. The key the “swoop” of the bang is to always keep the twists pulled down in front of your face while making the flat twists and don’t make it too tight. 

DSCF8222

I smoothed down a little baby hair in the front with some ecostyler gel and a soft bristle brush and pulled a single twist out to hang in the front just for kicks. I so love this style. The ends of my hair are tucked in with make it a great protective style and it looks professional which is perfect for work. My favorite thing about it is that the bang gives me a little forehead coverage for my big head! 🙂 Yay me!

Thanks for Reading!

Lina 


Share this:

  • Facebook
  • Twitter
  • Email
  • Pinterest

Like this:

Like Loading...

Winter Protective Style: Turbans

13 Tuesday Nov 2012

Posted by curlplease in Hair Stuff, Natural Hair, Style

≈ 3 Comments

Tags

Accesories, CurlPlease, Curls, flat iron natural hair, Hair, Love, Natural Hair, Style, Tips

Depending on the region or country you live in, winter can be harsh on natural hair. There’s low humidity (sometimes), and the winter can leave your coils and kinks dry, hard and brittle. I’ve decided to think of some protective styles that I’ll be rocking this winter to protect my marvelous mane…Style 1: Turbans!

Me sweating to death at Mayan ruins in Belize. 🙂 See how I wrapped my turban in my previous post here.


Check out these beauties in turbans!

image source

image source

image source

image source

She is gorgeous!

I can’t wait to try these different styles. Turbans are so easy to throw on and are a life saver on bad hair days or just to preserve twists or straightened hair. Although, I wouldn’t be bold enough to rock this at work, this will be a weekend staple for me.


Have a good one!

Lina

Share this:

  • Facebook
  • Twitter
  • Email
  • Pinterest

Like this:

Like Loading...

How to make a Natural Looking V-Part Wig

30 Tuesday Oct 2012

Posted by curlplease in Hair Stuff, Natural Hair

≈ 13 Comments

Tags

CurlPlease, Curls, Eco Styler, Hair, How To, Love, Natural Hair, Style, weave, Wig

Yes! I am still alive and blogging! 🙂 I have been doing so much ripping and running in the month of October. This month I got in a car accident (not my fault and I’m ok. Thank God!), my mom has been recovering from surgery, Homecoming was this month, and  the ever popular Magic City Classic (AAMU vs. ASU) was this month. I am always on the go, which is how I like it, but sometimes it cuts into my blogging and my hair projects that I have going on. Girls just wanna have fun!

 In September (YES it’s taken me that long!LOL) I started a project to make myself a wig after visiting a beauty supply store and seeing these cute U-part wigs on the mannequins. I was disappointed when I didn’t see any that would be believable for a Naturalista’s hair texture, so I set out to make my own. Boy oh boy was I astonished at the wonderful results!!!

Here’s What I used:

1 Wig cap, 1 Pack of 12-inch and 1 Pack of 14-inch Milky Way Que Water Weave in color 1B, Weave glue, a Mannequin head, 8 small side combs, scissors, a needle and black thread.

Put the stocking cap on the mannequin head to check the fit and to find out how to position the cap. Leave some slack at the top of the cap (will be cut off at the end) because when the V-Part is cut, it will increase the size of the wig, otherwise it will be too big.

Take the cap back off of the mannequin and put a plastic grocery bag on top of the mannequin head to protect it from the glue and then put the wig cap back on.

Starting in the back with the longer length hair first, measure, cut and glue the tracks to the weave cap and be sure to take your time and set the glue with a blow dryer for each track so that they don’t slip. Don’t glue the tracks on like a bee hive (in a circular motion to the center) or it will be harder to cut the V part and the cap will be weak in the V-part and hard to sew the side combs into.


When you get to the top of the wig, close the part tightly (no scalp showing) with a single track in a U orientation around the slack of the wig cap. Cut the slack of the wig cap off. There will be a small hole at the crown, but that’s ok because you have to cut a part anyway.

At the crown only, camouflage the deepest part of what will be the V-part by cutting hair from the track, dipping it lightly into a dab of glue and placing it on the crown and blow drying it.

See the hole where the slack of the wig cap was cut above.

I used extra track to fill in gaps in the front of the wig where the band of the wig cap is located. You can fill in the wig as you please. At the top of the wig, cut small pieces of track and glue them over the part to add more strength to the part for the sewing the side combs. I did not fluff the wig until I put it on because I didn’t want to over fluff and make it too big.

Carefully cut down the center of the part until you reach the crown. Using a needle and black thread, sew the side combs to the track. You can go around the spine of the comb or in between the eyelets of the comb like I did below. I sewed two combs on each side of the V-part and two combs in the back.

See how the wig gets much bigger after the V-part is cut.

To install the wig, I  flat twisted my entire head, separating a front section, and edge sections to the right and left side to be left out.


Used Bobbi pins and fold the ends of the twists up to the roots and pin them down to roots as securely as you can. It doesn’t matter in wich direction you pin them, it will look like this stretching a twist out method.

Leaving the top and edge “leave out” twists free, secure the combs in the V-part around them.


Take down the left out twists. Spray the generously with water and apply Eco Styler olive oil gel to the entire shaft of the hair to blend the leave out with the wig. Part the left out hair as you wish! Enjoy the FIERCENESS!!!

I got soooo many compliments on my hair this weekend from men and women. Everybody thought it was mine! I haven’t taken the wig off since I put it on! LOL! I hope you like it too!

Oh Happy Day!

Lina

Share this:

  • Facebook
  • Twitter
  • Email
  • Pinterest

Like this:

Like Loading...

Fresh Press

11 Thursday Oct 2012

Posted by curlplease in Hair Routine, Hair Stuff, Natural Hair, Natural Hair Regimen, Weekend

≈ 7 Comments

Tags

blow o, blow out, CurlPlease, Curls, flat iron natural hair, Hair, Love, Natural Hair, press, Products

I pressed my hair last weekend and I am sooo happy with my growth! According to the chart below I am below  (BSB) shoulder-blade length! looks like I only have 5 inches to go to get to my goal of waist length hair (in it’s pressed state). 

Pressing my hair is a long process for me and very meticulous, but it’s worth it to prevent heat damage after pressing.

First, I wash and detangle my hair while in the shower and rinse all shampoo and conditioner out. Then I cover my hair with a T-Shirt to prevent it from drying out while I prepare to deep condition.

Second, I deep condition my hair for 45 minutes to an hour with  AVEDA Damage Remedy. It is pricey at $26 a bottle, BUT I swear by this stuff!!! It’s the only deep conditioner I use in my preparation to press.

Third, RINSE WITH COLD WATER!! Cold water closes the cuticle of the hair and helps eliminated frizzies.

Fourth, spray my hair generously with AVEDA Brilliant Damage Control Spray. I put the T-Shirt back on my hair for about 15 minutes. After removing the T-Shirt and before blow drying, I apply a generous amount of grapeseed oil to the shaft and end s of my hair. %100 Grapeseed oil has one of the highest burn/smoke points of natural oils and is a natural heat protectant.

I Then, part my hair into 4 quadrants and secure them with clamps, and I blow dry my hair with a Conair Silver Bird Blow dryer on high a heat high speed setting. I know many won’t agree with the high heat but my opinion is, the straighter I get my hair with indirect heat, the less direct heat (flat-iron/pressing comb) I need to get my hair pressed.

I think I kinda like my blow out!

Lastly, Quadrant by quadrant I part my hair in 1″ sections, press the ROOTS ONLY with a Conair electric pressing comb on a medium setting, and press the shaft and ends with a Jilbere 1″ wide flat-iron on a medium setting.

 It’s so hard to get a pic of my hair’s full length because I have to turn my head to see the camera. LOL. Oh well…

For the first night of my press I always wrap my hair to help my hair “embrace” the pressed state. LOL. On the second night I start my flexi-rod preservation method. Read about my night-time roller set routine here.

Oh Happy Day!

Lina

Share this:

  • Facebook
  • Twitter
  • Email
  • Pinterest

Like this:

Like Loading...
← Older posts

Enter your email address to follow this blog and receive notifications of new posts by email.

Join 2,119 other followers

Top Posts & Pages

  • Silk Wrapping Natural Hair
    Silk Wrapping Natural Hair
  • Twist-Out using Jamaican Mango & Lime Locking Gel
    Twist-Out using Jamaican Mango & Lime Locking Gel
  • Natural Hair Wash and Go Regimen
    Natural Hair Wash and Go Regimen
  • Banana Clip Puff-Natural Hair
    Banana Clip Puff-Natural Hair
  • Natural Hair Moisture Robbers
    Natural Hair Moisture Robbers
  • Bohyme Brazilian Wave Hair Install
    Bohyme Brazilian Wave Hair Install
  • Roller Set Wrap on Natural Hair
    Roller Set Wrap on Natural Hair
  • Modified "Kimmaytube Leave-in" FAIL!
    Modified "Kimmaytube Leave-in" FAIL!
  • How to Stretch Your Twist-Out!
    How to Stretch Your Twist-Out!
  • Banana-Honey Deep Conditioning Treatment
    Banana-Honey Deep Conditioning Treatment

Recent Posts

  • SOAP BROWS TUTORIAL | NATURAL LOOKING BROWS
  • IT’S MY 20th VIDEO!!!| 20 RANDOM FACTS ABOUT ME
  • FASHION NOVA JEANS MINI HAUL| TRY-ON FOR TALL & SKINNY GIRLS
  • Wash-and-Go Tutorial
  • I’m Back and I’m Vloggin’!

Blog Stats

  • 214,791 hits

Archives

  • December 2016
  • November 2016
  • September 2014
  • July 2014
  • February 2014
  • June 2013
  • April 2013
  • March 2013
  • February 2013
  • January 2013
  • December 2012
  • November 2012
  • October 2012
  • September 2012
  • August 2012
  • July 2012
  • June 2012
  • May 2012
  • April 2012
  • March 2012
  • February 2012

Blogs I Stalk!

  • A Beautiful Mess
  • Black Girl with Long Hair
  • BLANK WHITE FRAMES
  • For the Fabulous and Frugal
  • Get Support
  • jadore-fashion
  • jeimysfashionloveaffair
  • kinky delicacy
  • kisforkinky
  • Sham I am Glam
  • The Feisty House
  • The Good Hair Blog

10 minute Accesories Alabama Anorak Jacket bebe Big Chop Birthday Blazer Blog Blow Dry Blush Bohyme Bohyme Brazilian Wave Bride bun Clothing Color Blocking Concealer Conditioner conservative Cooking Cosmetology Costmetology School Curlformers CurlPlease Curls dough nut earrings Easter Sunday easy Eco Styler Ecostyler olive oil gel Engineer Eyebrow Eyeshadow Fashion flat iron natural hair Food goals Graduate School Hair How To jumper lip gloss Love Make up mascara morning Natural Hair Natural Hair Meet-Up New Pencil Skirt Photos Pictures pony tail Products Protective Styles Puff rollers Roller Set Scarves Sew-in Shampoo Shopping Style Tips Tricks Turbans Twists Wash and Go weave Wedding Weekend Wigs Wraps

Meta

  • Register
  • Log in
  • Entries feed
  • Comments feed
  • WordPress.com

Top Rated

Blog at WordPress.com.

Cancel
loading Cancel
Post was not sent - check your email addresses!
Email check failed, please try again
Sorry, your blog cannot share posts by email.
Privacy & Cookies: This site uses cookies. By continuing to use this website, you agree to their use.
To find out more, including how to control cookies, see here: Cookie Policy
%d bloggers like this: